We recently asked the aircraft model builder for the Cold War Gallery, Lieutenant Commander Michael “PYSCHO” McLeod, USN (Ret.), to share with us the process he uses to build the incredible models on display in the Gallery. Below are his responses to our questions.
To see a gallery of the models he has built, visit the “Fly Navy” page of www.usnavymuseum.org, and click on “Aircraft Models.”
Would you tell us a bit about your career as a Naval Aviator and Airline pilot?
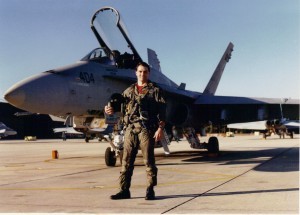 My flying career began officially in May 1981 when I was commissioned at VMI and provided orders to flight school in Pensacola…via six months “stash” at the Naval Air Rework Facility, Alameda, CA. That summer I was able to secure much flying in A-6E, EA-6B, S-3B, A-3D, and P-3C aircraft while teaching myself to fly the A-7E by using a 2F-84 simulator at the reserve unit during the week. Upon arrival in Pensacola in January 1982, I began the standard progression of many Naval Aviators that included T-34C (NAS Whiting), T-2C and TA-4J (NAS Chase Field). Upon receiving Wings of Gold, I was off to my first choice of orders at the A-7 Replacement Air Group NAS Cecil Field. My first fleet tour was with VA-46 CLANSMEN flying the A-7E and included the 1986 MED Cruise aboard USS America, CV-66. Following the sea duty came three years of shore duty as an Operational Test & Evaluation pilot at VX-5, located in the high desert 60 miles north of Edwards AFB, at Naval Air Weapons Station China Lake, CA. After three years of exciting test and evaluation work, flying multiple types of jets and civil aircraft, the career path dictated another sea tour. With most squadrons fully wound up and deployed for the imminent Gulf War, I arrived back as NAS Cecil in January 1991 and checked into the FA-18 Replacement Squadron for a year. Following hostilities in the Gulf, I joined VFA-87 GOLDEN WARRIORS the day they returned from the combat cruise. While with VFA-87 as a Department Head, we deployed to the Mediterranean and Middle East in 1993 aboard the USS Theodore Roosevelt, CN-71. In an expected manner, the end of my department head tour in Hornets meant the inevitable assignment to Washington, DC. I was able to secure duty as a Flight Test Manager for Tomahawk Cruise Missiles. I spent the next three years conducting Operational Test Launches (OTLs) and Nuclear Quality Assurance Tests (QUAST) missile shots at Point Mugu, CA and Eglin AFB, FL. With nearly 18 years of active duty completed, the airlines were hiring and the Navy was not able to keep me in the cockpit, so off to Delta Air Lines I went. The next few years were spent drilling in the USN Reserves until retirement eligibility while flying 737’s based in Orlando, FL. In 2002, the Orlando pilot base for Delta closed and I switched to the 737-800 based in Atlanta, GA. Since that time, I upgraded to my current jet and currently fly the 757/767 on domestic US routes.
How did you get into modeling?
I can actually remember my first model, as many avid modelers can. When I was 4, and my brother 5, my family lived with my Grandparents in a very small house in Pawling, NY and my Dad commuted to NYC where he worked as an IBM technician. One night he brought home two Revell models of Mickey Thompson’s CHALLENGER I, a Bonneville racecar. (For the aficionados; Revell kit H-1281:200 1962, 1/25th scale “Mickey Thompson’s CHALLENGER I Speed Record Holder 406.6 MPH Bonneville Salt Flats, Utah) We were thrilled to say the least, but had no idea how to build them. My dad spent the next few nights at the dining room table teaching us how to separate the parts from the sprue, sand the excess flash and tree plastic (with emery boards we stole from my mom!), and paint small parts before assembly. He emphasized carefully reading the instructions, knowing what we were doing, taking time to do a proper job, and working neatly in an organized fashion. Little did we know how important these skills would be later in our life! During this time, my family had noticed that on birthdays and Christmas I would not play with any toys I received unless they were rockets, airplanes, or military related things…my orientations were apparently set. I was lucky that my mother’s oldest brother Gerry (in an Italian family with 10 kids) had been a B-17 pilot in WWII, owned a Beech Bonanza, and was an R/C (remote control) airplane modeler. We often visited my grandmother’s on weekends where my Uncle Gerry would stop in for lunch then take me out to fly the R/C planes…I was in heaven! I was very oriented towards anything that had to do with aircraft, flying, and models by the time I was eight or nine. My main pursuit when not in school was building any plastic model, Guillow’s balsa and tissue planes, or selling greeting cards to “earn points” for a Cox .049 control line model. I am sure that many people can also relate to these adolescent activities. As I grew the modeling just kept getting more advanced and complex. I worked my way from control-line gas models into R/C planes. I can remember buying my first Paasche airbrush and marveling at how cool it was to be able to spray paint any color any time! By High School I had begun to dabble in more aggressive projects such as “scratch building” a Spitfire with a built up balsa frame, sheeted with balsa, and hand-made detail bits…I still have this model today interestingly enough. As with most people, the adventure of college (at VMI) and my early years in Naval service did not allow much time at all for modeling, although the love of all things aviation did introduce an additional pastime: skydiving.
All those years of modeling, and the important skills and disciplines taught by my dad and uncle, helped me to succeed in my Electrical Engineering degree and achieve high enough grades in flight school for jets: A-7 CORSAIRS, and eventually FA-18 HORNETS. While people often comment that I must have lots of patience to build such models, I think it is not so much “patience” but a “focus” on an objective. I see a “project” then decide in my mind what it should end up like…and determine the necessary and logical steps to get there. When you think about it, a given modeling project is not much different from many other endeavors we face on a daily basis in our work or home environments; we are faced with a desired outcome then attempt to achieve it. The skills that a modeler develops over time can include: understanding materials and their properties, woodworking, adhesives, various paints and their compatibilities (enamels, lacquers, oils, acrylics, and epoxy based), electronics, wiring and soldering, metalworking, drafting, sequential instructions, plastics, fuels (gasoline and ethanol/nitro), engines, aerodynamics, structures, propeller technology, pneumatic systems, and a few others. Therefore, it is understandable that modelers get a bit quiet when someone comments, “Oh, look at that toy airplane.” We do not build toys (you get toys from Fisher Price)! We build MODELS…replicas of real world machines, scale representations of things that inventors and pioneers struggled to design and make work. Our quiet hobby is, in a unique way, a tribute to the people who made new machines and invented technologies that serve mankind; be it aircraft, ships, tanks, trucks, cars, or spacecraft. With an affinity for aircraft and spacecraft, modeling was my springboard to learn more, to develop skills, to refine my disciplines, and eventually succeed in the career path I chose as a Naval Aviator and Airline Pilot. Now I find myself with more time to build models again – and delve into more advanced and challenging projects.
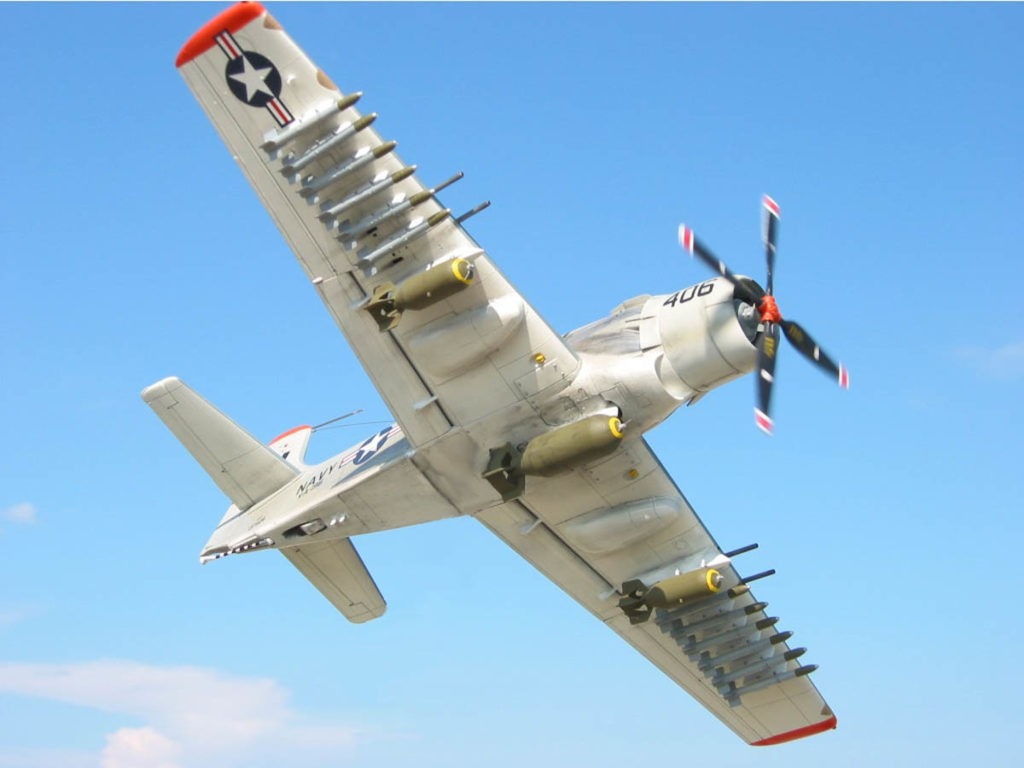
AD-6 Skyraider model built for the Cold War Gallery by Michael McLeod, a replica of the actual aircraft flown by Naval Historical Foundation President VADM Robert F. Dunn in 1955
How do you research your models?
Researching a particular model project can employ several different resources. Some of the discrete factors that set the vector of a model-building project address different levels of concern, and have varied degrees of impact upon the research phase when preparing to build.
- The scale of the model will determine just how much fine detail will be visible.
- The purpose of the build: just for fun, a club group-build, a serious competition model for a contest, a gift, or an archival quality museum piece.
- Relative availability of documentation: sometimes the obscure subjects are very challenging because you cannot find much about them.
- Kit quality: an old “rare” kit may have tragically poor quality and will take much work to make respectable, but may be the only kit of that subject available. On the other hand, a new-tool modern plastic or resin kit may have exquisite detail and available after-market “super details” available in resin and photo-etched brass.
- Corroborating information: it is better to have several corroborating sources than one out-lying scrap of data that implies information and is not verifiable.
- Multiple photographs: Clearly, photos are better than descriptive text but can present some problems for full documentation. Some subject’s photos only show “one side,” color pictures fade and present false information, and the “shades of gray” in black and white pictures cannot be relied upon for colors, only markings and patterns.
- Certified colors: it is wise to only use colors from researched color chips (and hand mix the paint yourself) or use paints specifically formulated by the manufacturer to replicate a given color.
- The operational environment affects most machines: use, wear, tear, fading, dirt, and grime. Use of good documentation will allow accurate replication of this…it is what modelers call “weathering.” However, it would be quite appropriate to have a shiny, spotlessly clean model if you were building a Funny Car, classic restored automobile, or Reno race plane.
The point here is to do your homework and exactly replicate the final “look” of the real item. This is a good place to point out the 1st Law of Scale Modeling: You never finish a model; you just stop working on it. The issue is you could go on forever getting finer and finer details, adjusting, and correcting. Alas, at a certain point it is good enough.
All that said; when I begin to research a model, I dig into my stash of books or acquire the necessary books that cover the subject. Great sources are the Squadron-Signal series of “IN ACTION” or “WALKAROUND” books with many high quality photos and key descriptions of specific variations and modifications. Subject-specific books by publishers such as Ginter Books, Osprey Publishing, Warbird Tech, and many others are available from libraries, book stores, and of course on-line also provide high quality photo documentation and textual descriptive information. Then I hit the internet where a wealth of information resides. Sometimes I find pictures of the exact subject, other times pictures of similar subjects from the same unit or theater of operations can provide critical information. On a few occasions I took pictures of the full-scale aircraft myself and prepared a “photo sweep” of the subject for my documentation package. The final and best source of information I seek is personal contact with someone who flew that aircraft. Lately I have been building “for fun” when I meet a person who flew some time ago, such as my Uncle Gerry (B-17’s), Clyde Good (test pilot at Edwards in the 50’s and F-107 project pilot), or Warren Lewis (7 missions in a P-51 with the 55th FG before being shot down over Germany). When I meet these people, I learn all about their exploits, and then I find a model of the plane they flew and build as accurate a replica as I can of their specific plane…THEN I GIVE IT TO THEM! Not only do I love to look on their face, I sure do not end up with a house full of models my wife has to dust (and break)! The main reason is that I can research vicariously through them, learn their personal stories, gather detail, and in the end present them with “their airplane”…and it means a lot to them since they have real ties to that machine. This brings us to the 2nd Law of Scale Modeling: The day after you finish a project, documentation will arrive that proves conclusively what you did is incorrect! Sometimes you get all the data up front and it is easy. Other times the factual documentation is elusive and some leads go cold. Therefore, you do the best you can with what you can find, and hope that you have it all and it is correct…but sometimes a little bit of info shows up annoyingly late just after you have stopped working on it (see 1st Law of Scale Modeling). If the correction is not too severe, the model can be re-worked a bit. Unfortunately, sometimes you cannot incorporate the late arriving data to the finished model without ruining it. Oh well!
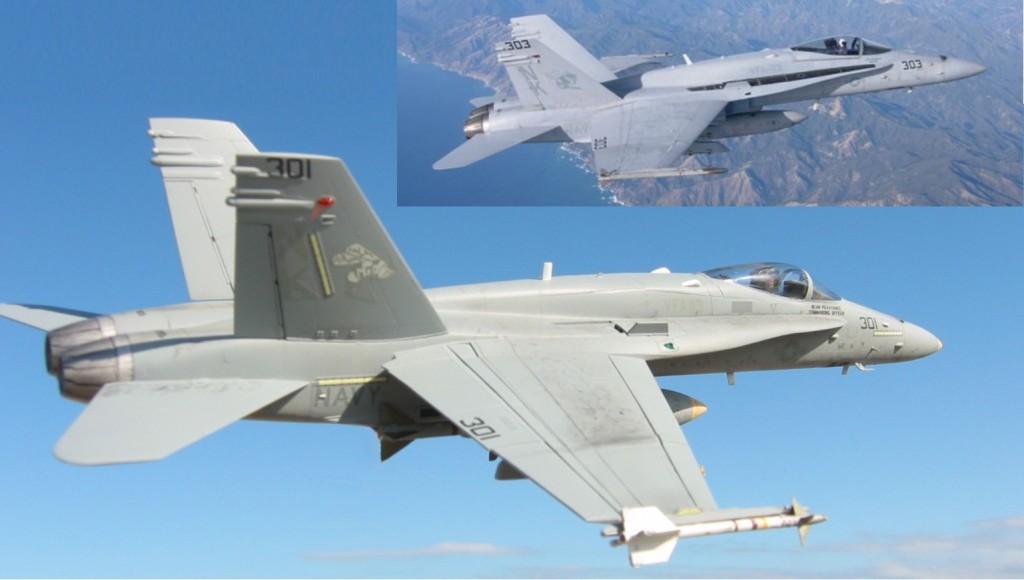
Comparison photo of model and a real aircraft, F/A-18C Hornet model built for the Cold War Gallery by Michael McLeod, sponsored by RADM W. W. Pickavance, Jr., VFA-113, 1983
What is your process for building models?
There is not really “one process” for building a model. Each modeler takes a slightly different approach because of personal preference, specific abilities, particular medium being used, project requirements, etc. Likewise, I have taken various approaches to building models based on the above issues. However, I mostly build aircraft and tend to use a similar methodology for most projects. After completing the research phase as described above, I clear, clean, and organize the workbench, paint booth, and tools. I open the kit and any after-market parts and inspect everything. I study the instructions, learn about the assembly sequence, and look for specific areas that may indicate structural problems (that I can engineer a fix for) or assembly sequences that I want to change. I rarely, if ever, follow the instructions as printed. I use them as a guide to verify part orientation and identify parts that depend on other “already attached” parts. I make a plan to have certain subassemblies built and not attached so that I can work more detail into the part or to facilitate painting and decal application.
Next, I begin to explore the available after-market resin upgrades or photo-etch details that will be used. I make notes on the instructions about desired assembly sequences and color schemes. Often, the model must have some plastic parts ground down to be thinner to allow after-market detail parts to fit and the resulting loss of material creates a strength problem to fix prior to continuing. Then I begin taking some of the larger parts off the sprues and trial fitting them to learn about the quality of the mold and accuracy of parts fit.
Initial construction begins with macroscopic modifications to large parts and refitting them to assure alignment. Then small parts are cleaned up, prepared for painting, and organized into small plastic cups (from Jell-o pudding – Yum!) to keep track of them. This is a lengthy process and involves much close in detailing of parts and pre-assembly / painting. Also during this phase, I go through all parts and apply improved surface detailing where able. This step is quite important as it can transform an older kit with low quality molding into a much better looking subject with crisp, accurate details. A good example is the usual aileron or elevator that is not a separate piece rather it is molded into the wing or stab. The control surface is not a separate part and a molded groove (shallow and rounded) surrounds it. Many modelers will take this as-is and apply a wash of dark paint to “highlight” the interface between the control surface and the airframe. This always ends up looking like a small trench filled with dark paint – for that is what it is! I use scribing tools to scrape and etch the groove deeper into the plastic and cut a “3-D” interface. I will round the leading edge of the control surface and use #11 scalpel blades to cut a sharp, deep, recess under the airframe side of the interface. Then, using micro saws, I will cut very thin separations at each side of the control surface. When complete, the parts are still attached, but they have the appearance of being two parts that have been joined. Now, when final finishing is done, I will not have to add a colored wash to highlight the gap since it now looks “3-D” and has the proper scale appearance. This type of part modification is performed on any part where it can increase the local detailing and provide a better-looking finished product.
As subassemblies are being built and detailed, overall details are being added and required scratch-built parts are explored. Often there can be a specific pod, antenna, or structural part that is not on the kit but is required for the variant of the model so the builder must fashion said parts from scratch. This can be a real test of your abilities! Often there must be some pre-assembly of parts with tape and rubber bands so that the scratch built part can be sized correctly while fit and alignment can be built in to the part. About this time, the clear plastic parts are cleaned while still on the sprue and processed for crystal clarity by dipping in FUTURE floor polish, a tough acrylic emulsion.
At this point, a lot of time has been spent working on the model and not much has even been put together!
Now we move to the spray booth and the first thing we do is make sure there is plenty of lighting and put on the respirator! Very small parts are quickly brush painted, but most parts are airbrushed to give the best, most consistent high quality finish. Most painting is with “flat” or “non-specular” paints since they cover better in thin coats. Glossy paints are much more thick, do not always cover as well, and take much longer to dry, fully out-gas, and harden. A cool trick for an area that needs to be glossy is to prime it with a very thin coat of the same color in “flat”, then when dry give it a coat of well thinned paint of the same color in “gloss”. This will provide the proper color, a nice glossy finish, minimal overall paint thickness, and most preservation of surface details. In addition, the well-thinned gloss dries much quicker too.
A critical and difficult step now is to rework any propeller or rotor assemblies, assuming we are not building a jet. I always make rotating parts and others such as refuel probes, removable and out of stronger materials. This allows the parts to be painted separately and improves finish of both the part and the overall model surfaces. It also makes the parts much stronger and resistant to damage from bumps in transit or cleaning, while allowing disassembly for transport if needed. Each prop or rotor assembly is hand drilled with a pin vise to make a perfectly centered hole into which a steel or brass music wire or small carbon fiber rod/tube is CA’d. The trick is to work carefully and when the shaft is locked in the blades turn in a single plane and “track” straight. Then, on the airframe side of the model, modify the engine or nacelle where the shaft will mount with a piece of brass tube that provides a very snug fitting bushing that will allow the part to turn freely without any wobble. This step ends up being quite iterative, but the results yield perfectly fitting, highly detailed props and helo rotors that turn freely on metal shaft/bearings that will not wear out or bind. Now, how cool is that?
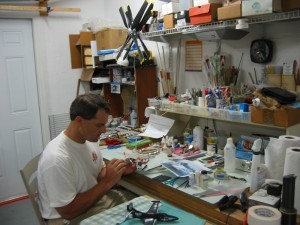 Wow! All this work so far and we are now just about ready to “start building”! At this point, we have substantially reworked the kit and have much improved details on all parts, improved structures, ready to use subassemblies, and necessary scratch built items ready. Now the building begins and it progresses quite rapidly compared to the earlier processes. The types of adhesives used in modern modeling vary. Regular plastic (styrene) can be bonded with liquid cement or CA type glue. CA stands for cyanoacrylate (super glue) which is a self-polymerizing acrylic emulsion. CA is also required anywhere resin parts are bonded, either resin-to-resin or resin-to-styrene. On some specialty kits that are completely made of cast resin parts and metal, CA is the only adhesive used at all. All parts are pre-painted where necessary, and then construction proceeds. Where major parts are bonded with liquid cement, a day or two cure-time is required before any more work can be done because the joint can be corrupted or mis-aligned. Any joints bonded with CA are fully cured in minutes and construction can proceed. As everything comes together and care is taken to keep everything aligned and true, seams and glue joints must be cleaned up and blended into the surface as you go. Often this will require some re-scribing of panel line and rivet details.
With major assembly done, and subassemblies ready, we can pull out the high quality modelers grade fiber masking tape. This is special tape that has some stretch and seals against paint bleed through very well. First mask off any glass areas, then shoot flat black onto any canopy or window frames (so they look black from the inside). Then go about laying down all the colors and panels for the model. The painting stage always seems to be the most fun because for the first time you see the final product emerging from the amalgam of plastic, resin, and photo-etch. However, this step also drags a bit because the base coats and overall colors must fully cure before you can mask over them to lay down trim colors and things like de-ice boots and wing walks. Just take your time because painting defects are murder to fix…if they can be fixed at all!
At this point, I like to pre-weather the model using chalk pastels and light airbrush work. Since I generally use “flat” paint, the rough surface is great for blending in the colored dust from chalk pastels to make it look dirty, a bit grimy, and add things like exhaust streaking and foot prints. Gloves must be worn for this task because the pastel dust will make all sorts of fingerprints in the paint that are nearly impossible to get out. Once the pre-weathering is complete, it must be “locked in” with a clear coat.
When all the major painting / weathering is done, and cured, the entire model gets an overcoat of clear gloss to prepare for decal application. Decals cannot bond to any “flat” paint so this step is critical. Clear enamel is the best “shiny surface”, but clear enamel can yellow over time and that is not usually acceptable unless the model is overall black or Dark Sea Blue like a Korean War plane. Therefore it is better to use a clear acrylic (water based) overcoat that will take several coats, but will never yellow and can stand up to some weathering techniques if you use enamel thinner based washes as acrylic is resistant to those types of solvents. With an overall gloss finish, apply the decals using a decal setting solution to position and lay down, then decals solvent to dissolve / melt the decal into the surface and capture any underlying details. Once all the decals are dry, go over them with some of the chalk pastels to match them to the surrounding areas. It looks weird when a very weathered model has dirt and grime everywhere yet the markings are pristine and clean. When the decals are weathered, give everything another generous coat of clear gloss to lock down the pastels, put a protective coating on the decals, and blend the decals into the surface so they look “painted on”. At this point, the model may be too glossy, so some gradual mist coats of a clear dull-coat lacquer or acrylic will knock off the shine. Work slowly and take the finish where it needs to be – semi gloss or dead flat – whatever it takes.
Now we tackle the final steps to put on some of the final micro details that help bring the model to life. Perform any final adjustments in weathering on the dull-coat by using more chalk pastel or light airbrush work as needed, and then lock it in with a light dull-coat layer. Unmask any navigation lights and anti-collision lights and colorize were needed with clear acrylic color like red and blue-green. If some areas have a shiny look because of streaking oil on the surface, give them a light airbrushing with clear gloss and they will take on a bit of a “wet look”. Give everything a good inspection and QA. When satisfied that nothing else will be painted, remove the masking on the windows and the model is complete!
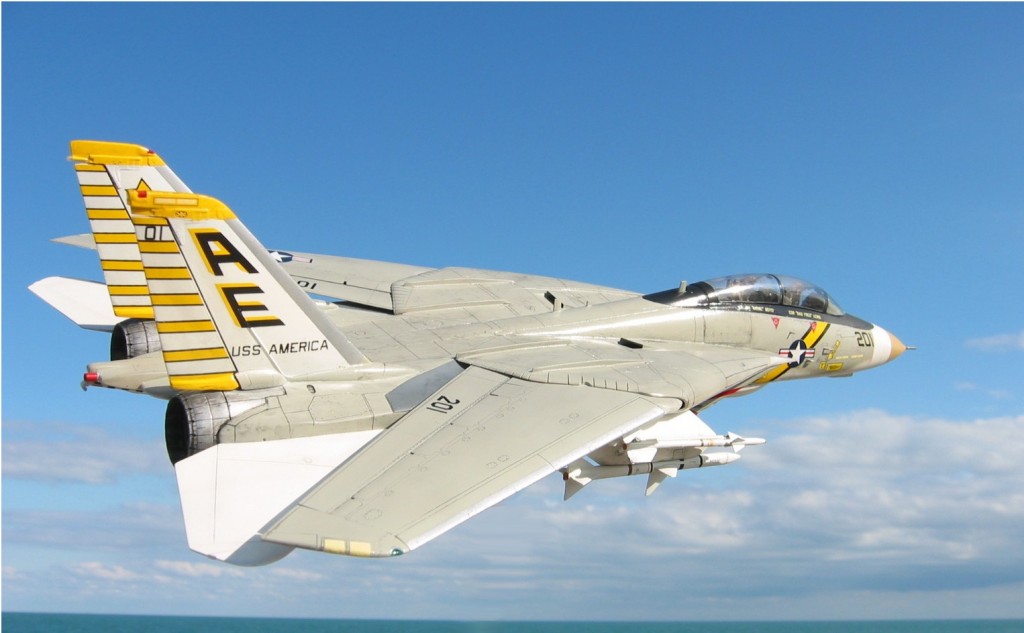
F-14A Tomcat model built for the Cold War Gallery by Michael McLeod, sponsored by RADM Frederick Lewis, VF-142, 1976.
Have you faced any special challenges in the Cold War Gallery project?
The CWG project is unique in that a significant collection of models have been assembled and they each replicate the specific real world aircraft of a famous Naval Aviator as it was when they flew the machine. This has created a very detailed process that requires much direct contact with the actual person who flew the aircraft, those that were in the squadron at the same time, and verifiable historical archives research. Since each one of these subjects is a “one off” there must be some level of custom markings and decals made for each model. In some cases, there are kit or aftermarket decals from the same unit at the same period that provides the major markings and stencils. If this is the case, small changes such as MODEX numbers and the personal names on the side of the aircraft must be made with homemade decals.
Making custom decals can be a lengthy and drawn out process. The graphics may begin with a poor quality scan of a squadron patch that must be processed into a detailed vector file for sizing and manipulation. The colors that we see on our computer monitors are often not the same colors that a printer will produce. Colors must be manipulated from a choice of “pallets” such as red-green-blue (RGB) or cyan-yellow-magenta-key (black) (CYMK). With graphics complete, tests-shots are printed, snipped, tested for shape and size, and corrected until everything is perfect. There are myriad complications related to the actual printing of the decals onto appropriate decal stock and the necessary shade adjustments that are beyond the scope of this article. Suffice to say, making custom decals is time consuming but can provide incredible accuracy and detail for a “one off” subject.
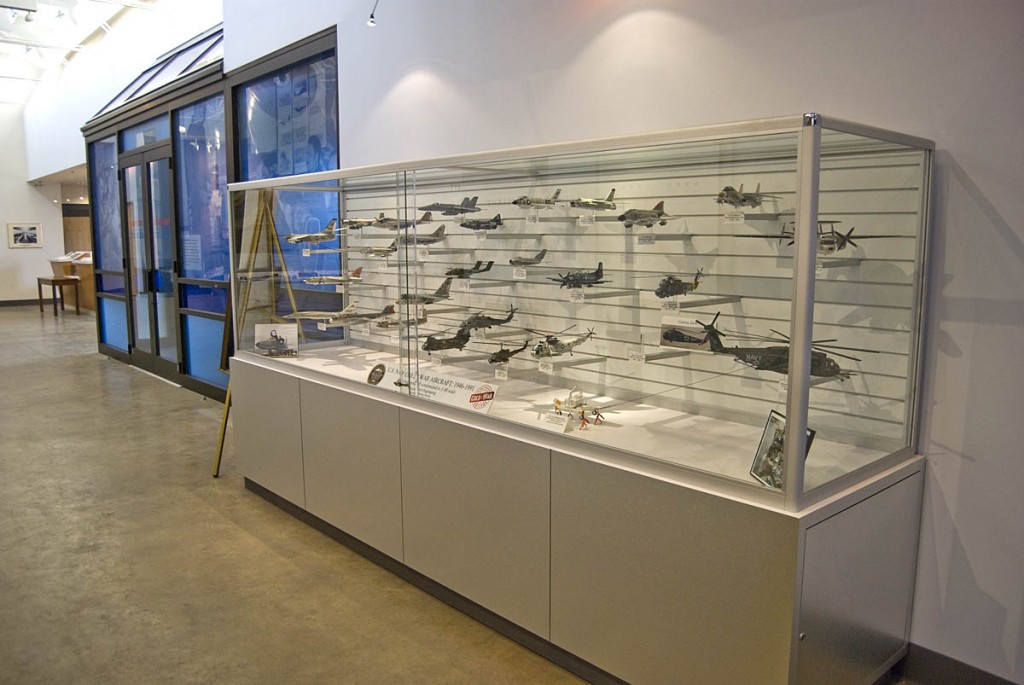
Since the full complement of CWG models will be on display together, a unified mounting system was developed to allow proper display and provide adequate protection. As the concept for each model was to show the machine that a person flew, there are no pilot or crew figures in the models and all interior cockpit details are visible. Also, since these are flying machines each is configured with the gear up, flaps up, as if cruising through the air and loaded with the appropriate, representative ordnance specified by the person who flew it. The solution to these many issues were solved by designing a custom display case with a slat-wall back that holds each model on its own mounting bar with many levels for each slat row, and infinite side-to-side adjustments. The models can be displayed for optimum visual impact, view of details / ordnance, grouped for similarity of mission / chronology, and theater of operation.

Pingback: RADM PD Smith Visits Cold War Gallery | Naval Historical Foundation
Pingback: New Aircraft Additions to the Cold War Gallery | Naval Historical Foundation